Monday 14 March 2011

Image 3 - Portrait inspired by Dorian Grey

For my third idea I decided to produce a portrait inspired by the legend of Dorian Grey. I have decided to put a 20th century twist onto the image by using a portrait which is undoubtedly from the 21st century. I am going to signify the outcome of Dorian Grey's life and ageing of the painting by imposing a skull into the portrait.


Dorian Grey - The portrait serves as a reminder of the effect each act has upon his soul, with each sin displayed as a disfigurement of his form, or through a sign of ageing.


Rene Magritte was a surrealist artist. It is said that his intended goal for his work was to challenge observers' preconditioned perceptions of reality and force viewers to become hypersensitive to their surroundings.


In many of Magritte's paintings he superimposed objects into them, like is seen here, to create a sense of mystery. This is similar in theme to what I am going to do. However my final image is going to be more obvious in meaning as the object I am going to impose is a skull and that obviously connotes death.


Skull found at - http://themanwhonevermissed.blogspot.com/2010_07_01_archive.html
Texture found at - http://www.psdeluxe.com/tutorials/special-effects-tutorials/sinful-desires-photo-manipulation/

I produced my final image by firstly cropping the portrait. Next using the quick selection tool I removed the skull from its background. I then pasted it as a new layer onto the portrait and used free transform to match it to the size of the existing head. I then reduced the opacity of the skull and erased the areas which covered up the fringe of the model. I left the opacity at 75% to make it look more 'natural' as a face. Next I used the colour balance tool to match the colour of the skull to the model's skin. I then used the quick selection tool again to select the whole of the model's body including the shadow and pasted it onto the textured background which I had already had added as a new layer. I used refine edge so that the shadow didn't look too blocky. Lastly I used the colour replace tool to give the background a pinkish tint and added the poster edges filter as a smart object to the background.

Final Image

Idea 2 - the four elements

For my second idea I decided to produce an image consisting of four separate photos, each one representing a different element: water, fire, earth and air. These elements juxtapose each other which is the theme for this idea.

Many people have studied this subject and put their own take on it. This is the German painter Adolf Ziegler's version.


  • Image 1 - water


To make this image I imposed the image of the water splashing out the glass onto on the earth. I then used free transform to to make it the size I wanted. Next I used the eraser to get rid of the wine glass and leave the water splash. I then used the clone tool to make the joining less severe as well as the eraser with the opacity lowered.


Earth taken from - http://www.widescreenwallpapers.org/earth-7-wallpapers.html
  • Image 2 - fire


To make this image I imposed the image of the fire onto on the earth. I then used free transform to to make it the size I wanted. Next I lowered the opacity of the image so I could see the globe beneath and used the eraser to get rid of excess fire. I then used the clone tool to make the joining less severe as well as the eraser with the opacity lowered.

  • Image 3 - earth


To make this image I firstly removed the seedling from its background using the quick selection tool. I then imposed the image onto on the earth. Next I used free transform to to make it the size I wanted. Then I lowered the opacity of the image so I could see the globe beneath and used the eraser to get rid of excess soil. Finally I used the clone tool to make the joining less severe as well as the eraser with the opacity lowered.

Seedling taken from - http://www.equippingfamilies.org/Familiy%20Ministry%20new.html

  • Image 4 - air


To make this image I firstly removed the wind turbines from the background using the quick selection tool. I then imposed the 3 images onto on the earth. Next I used free transform to to make the turbines the size I wanted.


Wind turbines taken from http://browse.deviantart.com/resources/?qh=&section=&q=wind+turbine#/d39mhl3


Final Image


Idea 1 - Salvador Dali Landscape

For my first idea I have decided to produce an 'imagined fantasy landscape' in the style of the surrealist painter Salvador Dali.


Dali's name is synonymous with the surrealist movement. He produced  paintings which were often photorealistic featuring an array of unusual objects. He used extensive symbolism in his work - themes which often arised were religion, science and time.


The symbolism behind this painting 'The Persistence of Memory' suggests Einstein's theory that time is relative and not fixed in regards to the 'soft watches.'


Eggs are an item which is often seen in Dali's images. The prenatal aspect of an egg symbolises love and hope.


This painting by Dali  'Christ of St John of the Cross' is unusual because it is at such an extreme angle. This composition in which Christ's arms forms a triangle is seen as a reference to the trinity as a triangle has three sides.


The rose in this painting is a female sexual symbol. It also represents the couple's love who are situated in the bottom of the painting.


For my own work I am going to produce an image similar in composition to a significant amount of Dali's work. I am going to use a landscape and impose additional images into it.

Final Image - This is my own composed landscape in the style of Salvador Dali. I will now go on to explain how it was made and the symbolism behind the objects in it.

  • Background Layer - sky


I thought this would be a good choice for a background because it is simple and similar skies are seen in Dali's work.


  • 2nd Layer - foreground

I then added this foreground for similar reasons. I used the quick selection tool to remove the rest of the image and just keep the path. I then used the clone tool to replace the areas of patchy grass.


  • 3rd Layer - rose sun

 I added the rose sun into the image because roses are often seen in Dali's work. He used it as a symbol of female sexuality, and   the sun brings life to the world like a woman does. 


I used the quick selection tool to remove the background and leaves and pasted it as a new layer. I then altered the colour from red to yellow using replace colour so it was more like a sun.I lowered the opacity so that the beams from the sun on the sky image looked like it was coming from the rose and so that it looked like light was shining from it. 


  • 4th Layer - 3 daggers

I decided to add three daggers into the image as they are a symbol of death and fits within my overall theme of time. I chose to use three and place them upside-down as a reference to the crucifixion and the three crosses on the hill.

I used the quick selection tool to remove the dagger from it's background.I pasted it as a new layer and then used free transform to rotate it. I used alt to copy it twice more.


  • 5th Layer - castle

I added a castle to the image to symbolise time passing and 'looking back into the past.'


Again I used the quick selection tool to remove the castle from the background. I used free transform to resize the image.


  • 6th Layer - apple

I put an apple into the image as I symbol of life and growth.


Again I used the quick selection tool to remove the apple from the background. I used free transform to resize the image.


  • 7th Layer - branch

I decided to have a branch overlaying the photo because it adds interest and provides a base to put objects onto. It symbolises 'the tree of life.'


I removed the branch from the background by using a quick mask. I then resized it using free transform to fit across the whole image.


  • 8th Layer - Car
I added a car into the image to symbolise transportation and time speeding up.


I used the quick selection tool to remove the car from the background. I used free transform to resize the image and alter the angle.


  • 9th Layer - bird skull

I decided to add the bird skull as a symbol of death. I made it seem like it was half buried in the grass to show decomposition.


I used the quick selection tool to remove the skull from the background/remove the reflection. I used free transform to resize the image and alter the angle and used the eraser to remove the tip so it looks like its stuck in the ground.


  • 10th and 11th Layer - 'soft watches'
Some of Dali's most famous paintings feature the 'soft watches.' He saw a symbol of one of Einstein's theories that time is relative and not fixed.


I created the two melting clocks by firstly using the clone tool to get rid of the reflection. I then used the liquify filter to make it appear like they are melting. Lastly I used the quick selection tool to remove the watches from the background.


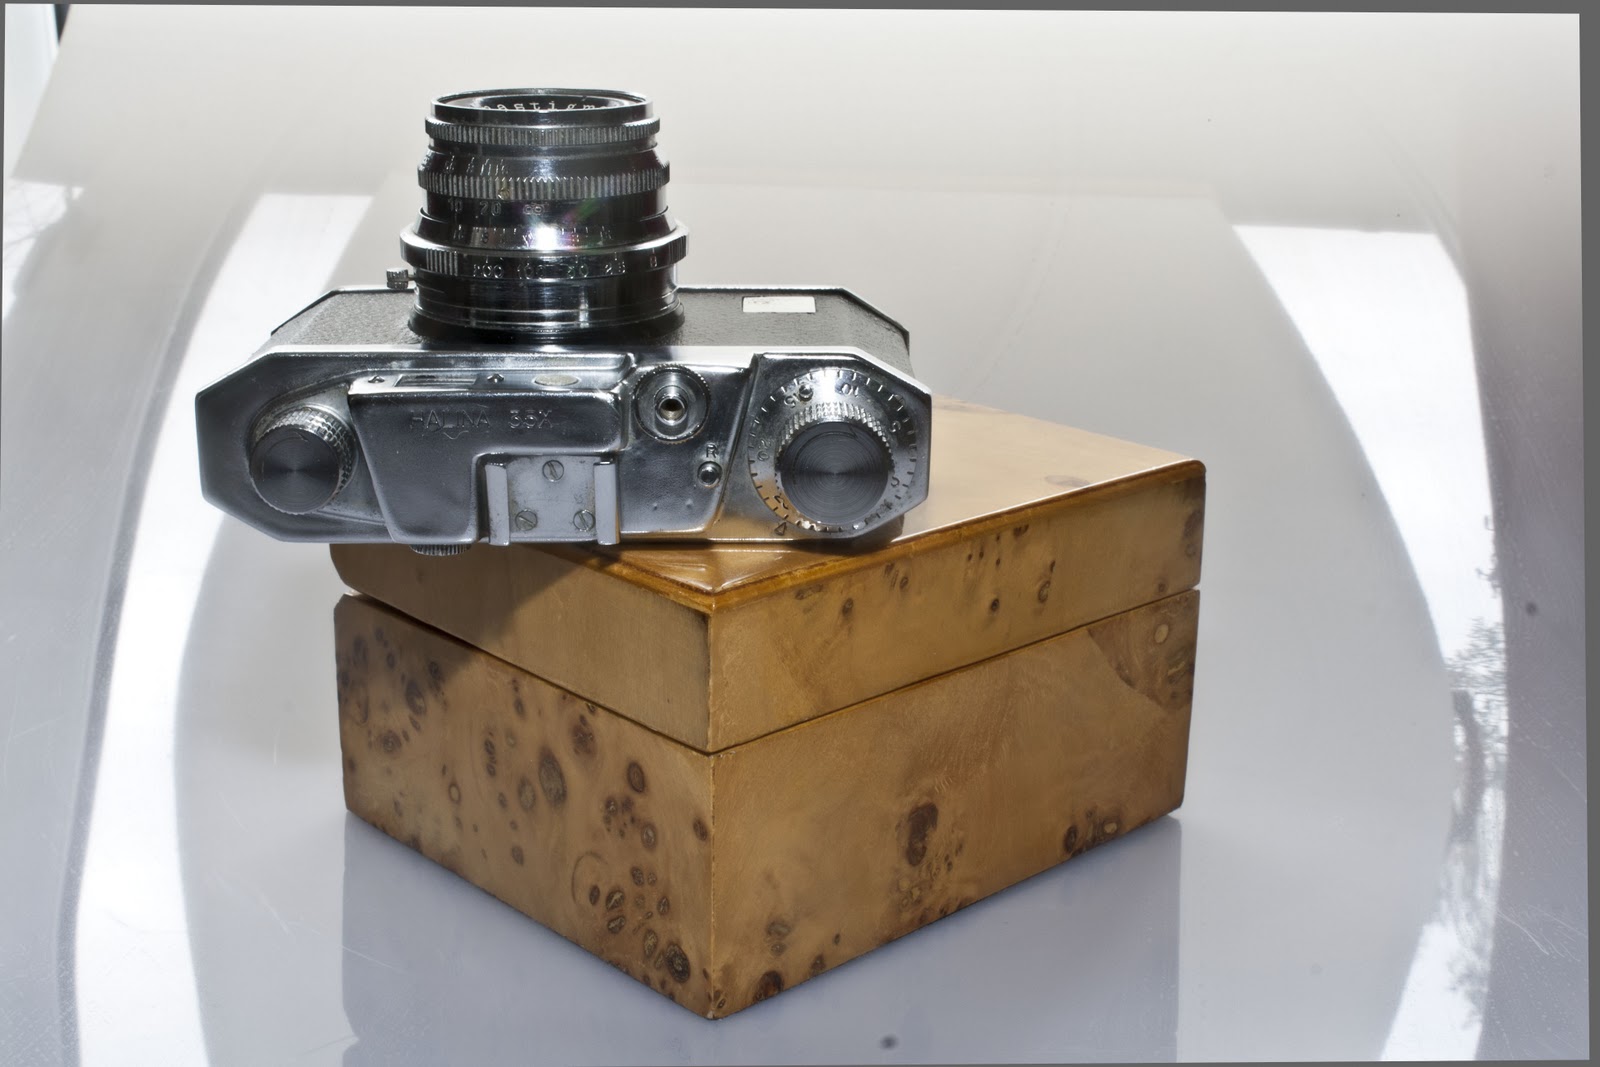
  • 12th Layer - Melting camera
I decided to include a melting camera to symbolise 'captured time.'


I created the melting camera by using liquify filter. I then used the quick selection tool to remove the camera from the background/box and used free transform to resize the image and alter the angle.


  • 13th Layer - shell

Conch shells which spiral to the right are believed to echo the celestial motion of the sun, moon, planets and stars across the heavens.


I used the quick selection tool to remove the shell from the background. I used free transform to resize the image.